Welcome to my Hero Siege beginner’s guide. Throughout this guide, I will introduce you to all the key concepts that will help you progress through the game and understand your objectives.
From powerful builds and expert leveling strategies to Runewords and Jewelcrafting.
If you have ever played a game in the Diablo series, this 2D, top-down hack-and-slash will be very familiar to you.
Hero Siege is filled with bosses with affixes and abilities, tons of enemies, and loot to help you progress further than other players in a leaderboard.
If you require further guides that cover topics more deeply, such as Leveling, Mining, Gearing, or Relics – you can view the full list of guides here.
Hero Selection
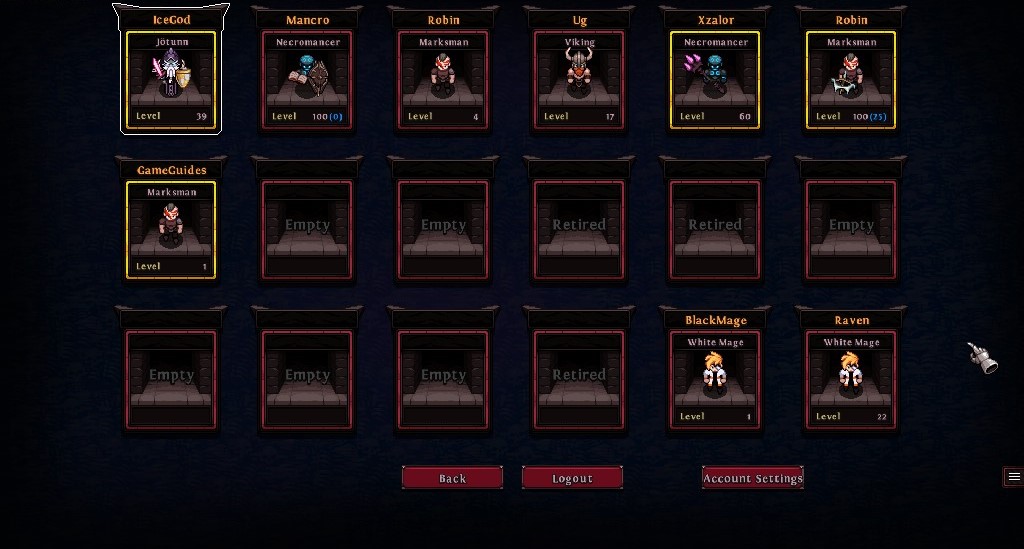
In your hero selection screen, all playable heroes are displayed here, including open slots for new heroes to be created,
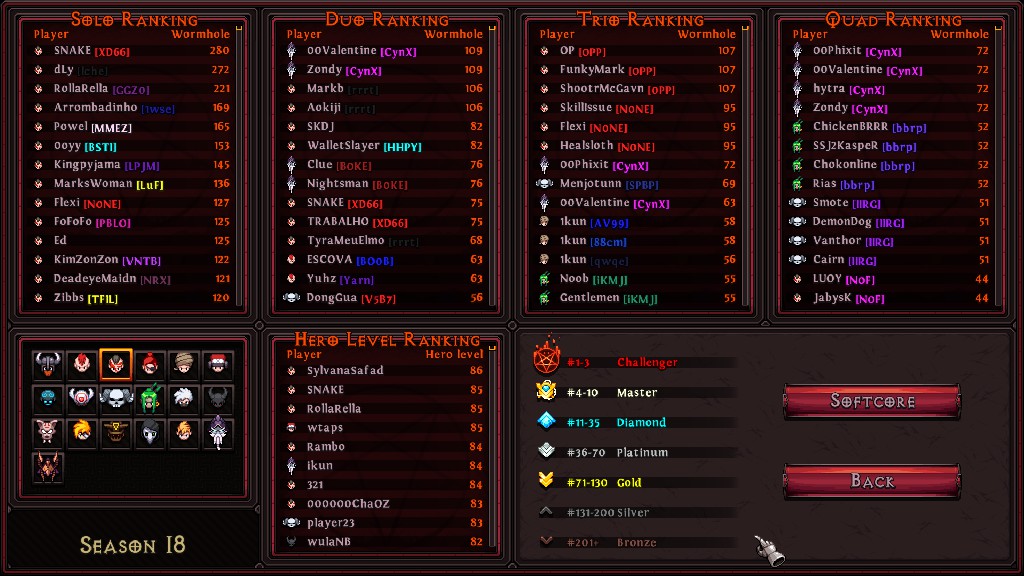
If the hero has a yellow border around it, it has been created within the current season and will contest for leaderboards amongst other players by gaining wormhole levels.
An example of the leaderboard table is displayed in the image below.
Once you have created your character, you will enter the lobby to view the global, trade, and guild chats.
To start playing, click Create Game. For a brand-new character, you can only select normal mode. You must beat a difficulty to unlock the next.
However, you can increase the level of your selected difficulty, making the enemies more challenging but increasing your rewards and experience.
If you want to gain experience quickly, you must find a difficult balance. The difficulty must be as high as possible, but you also want to continuously move around the map to kill monsters quickly and progress through the story.
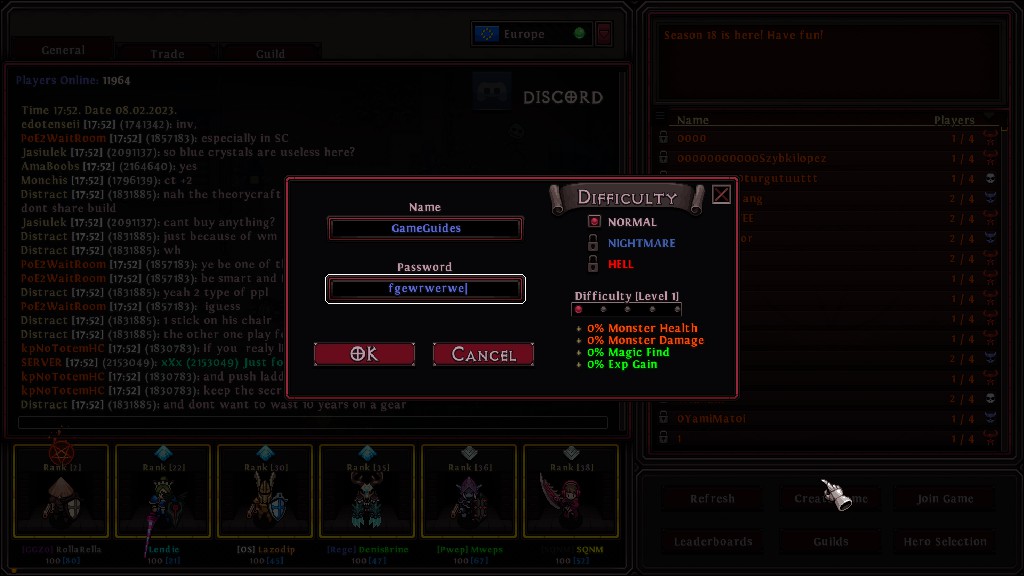
As you create the game, you can enter a password so that nobody can join your game, or you can ignore the password, allowing other players to join your game at will freely.
How to Play Hero Siege with Friends
Hero Siege is available for Local couch Co-Op and Online Co-Op, but you cannot play locally online together. This is how you set up each Co-Op game.
Local Co-Op
- Select ‘Play Local‘ on the title screen.
- On the character selection page, press start on a different controller, and that controller will be added as another player to the game.
- Select a created character to play from the Hero selection screen.
Online Co-Op
- Select ‘Play Online‘ on the title screen.
- Select your character and enter the lobby.
- If you would like to host a game, select ‘Create Game‘, then choose your difficulty and create a password to give to your friend.
- If you want to join your friend’s game, select ‘Join Game’ and enter the password given to you by your friend.
River of Inoya (Tutorial Level)
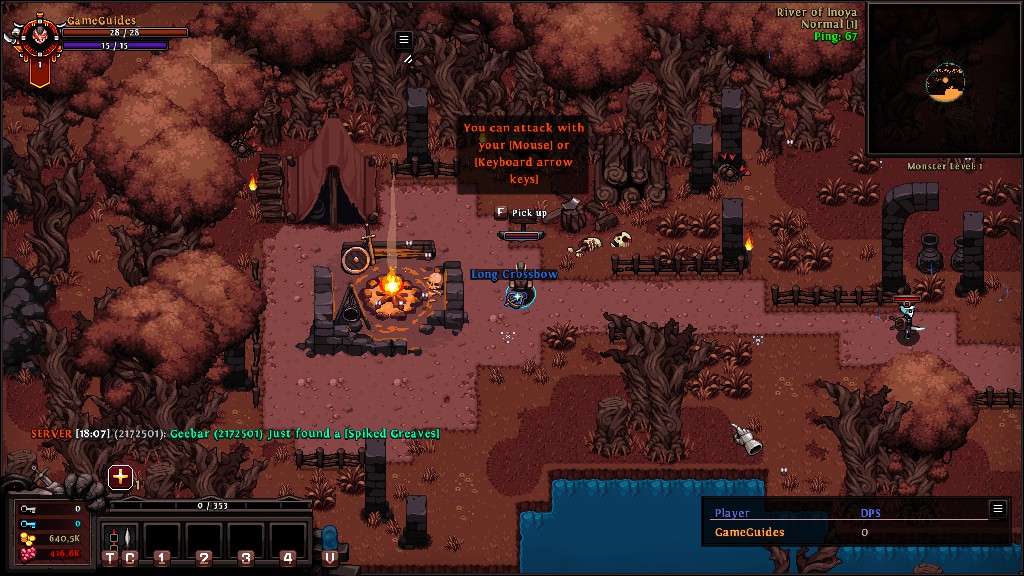
You will instantly be dropped in the River of Inoya, with a weapon to collect and signposts telling you how to play the game. Follow the linear path and read the signposts, then you will quickly learn how to play the game.
Hero Siege is both Mouse + Keyboard, and Controller friendly, so choose the control you feel most comfortable playing with.
However, later in the game, when you start trading and using your mailbox, you will highly benefit from using a mouse and keyboard.
Talents
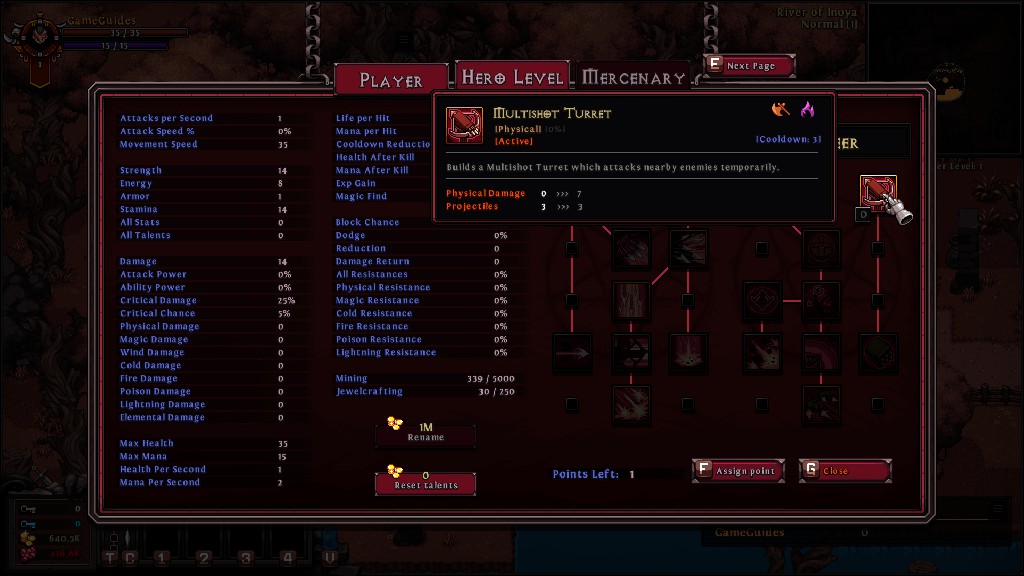
You will immediately gain 1 talent point to spend on a new character, you gain a talent point at every level.
When you hover over a talent, the tooltip will provide information on the ability:
- How much damage the ability will deal
- Whether it is [Active] or [Passive]
- The Cooldown of the Active ability or Proc chance of the passive ability
- Icons in the top left showcase whether the talent benefits from strength, energy, or both
Each row of talent points requires you to spend at least 1 talent in the previous row and reach a level requirement.
The talents generally become stronger as you go further down the rows.
- Row 1: Level 1
- Row 2: Level 12
- Row 3: Level 24
- Row 4: Level 36
- Row 5: Level 48
Do not hesitate to reset your talents and put more points into abilities you use more often, especially in the earlier levels when resetting your talent points is free.
Control Configuration

This section is essential for you to feel comfortable while you play. Heed my advice here carefully.
Each talent will be bound to its own key.
As you gain more levels and gear, you can fall into a position where you are constantly spamming your skills while you move.
To make casting more effortless, you can hold down the talent key, and the skill will cast again when it is off cooldown.
To simplify this, you can map every skill to the same button in the controls menu if it suits your playstyle.
Like playing a racing game, you can hold down a single button and it will cast all your skills on cooldown constantly in order from left to right, with a small global cooldown in between before casting the next skill.
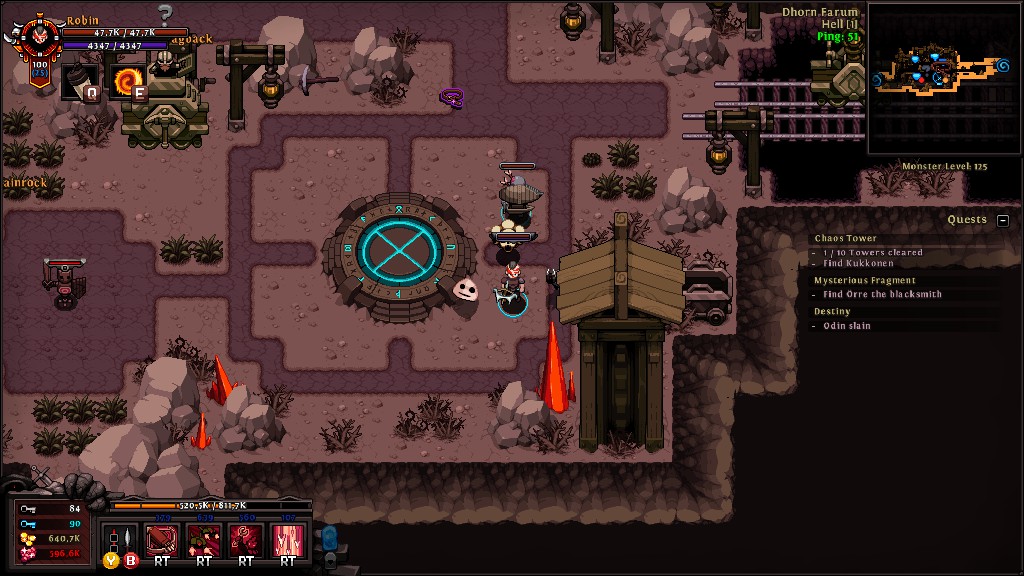
If you tap the single skill button, it will only cast the first skill. If that skill comes off cooldown and you tap the skill button again, it will once again only cast the first skill.
Hero Stats
On the left side of the screen on the talents page, you can see all the stats you can view every available stat your hero has, for every damage type to every resistance to the elements.
As you start playing the game, you do not need to worry about these stats much; ensure that you are continually equipping better gear as you progress throughout the game, and make sure you know whether your character needs energy or strength as a primary stat.
Notable useful stats early game:
- Strength/Energy for damage
- Exp gain to reach the next level faster
- Speed for navigating around the map quickly
- +All talents for a huge damage boost to your abilities
- All Stats for damage and survivability
Dropped Items
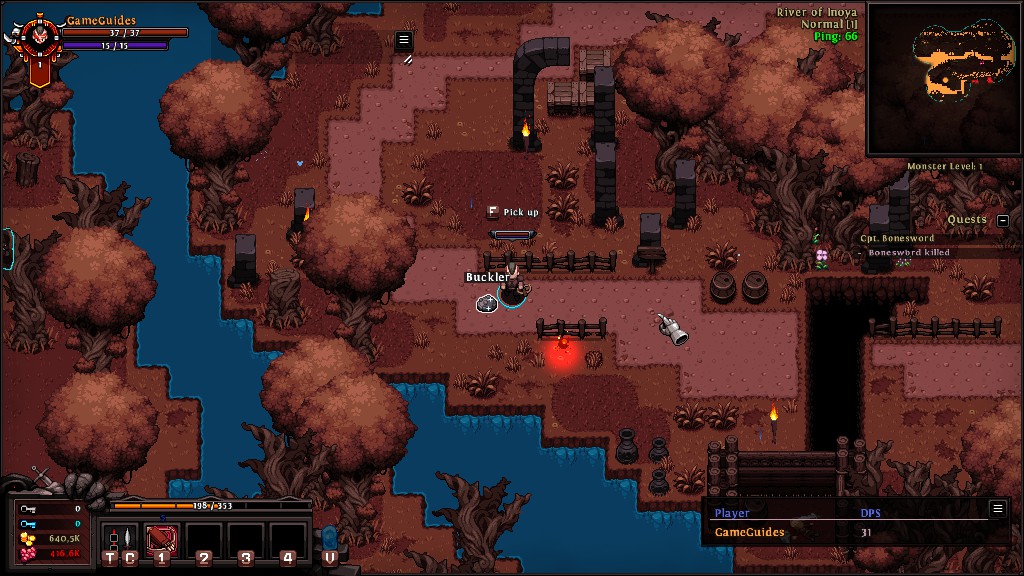
As you kill enemies, items may drop on the floor, from gear to gold/rubies, or health and mana orbs.
To pick up items in Hero Siege, your character needs to stand near the item then press your action button, which will show up on the screen (F on PC by default).
If you pick up an item in a slot that you do not have equipped, you will equip it automatically as you pick it up.
Items are crucial for your damage output and will be your primary focus when you reach the end game at level 100, alongside mining to ensure you have the necessary gems to bring your items to their highest potential.
Items are dropped in a variety of tiers in this order:
- Common
- Superior
- Rare
- Legendary
- Mythic
- Satanic (Nightmare or Hell Difficulty)
- Set
- Heroic
- Angelic
Loot Filtering
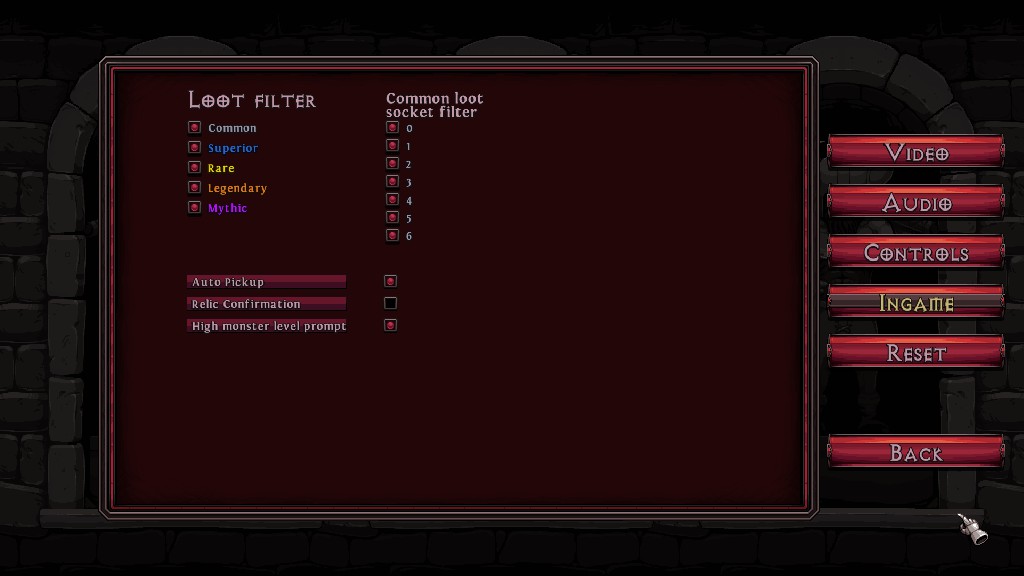
Common items are very weak and are easily replaced. You should be able to quickly find a complete set of Rare pieces while killing enemies to give you a good head start into the game.
If you see too many undesirable pieces drop as you are killing enemies and you would not like the drops to show on the floor, you can change your in-game setting in the menu to stop them from showing.
As well as this, you can also filter the number of sockets you would like to drop from Common items, which will help craft Runewords.
Runewords (Strong Common Items)
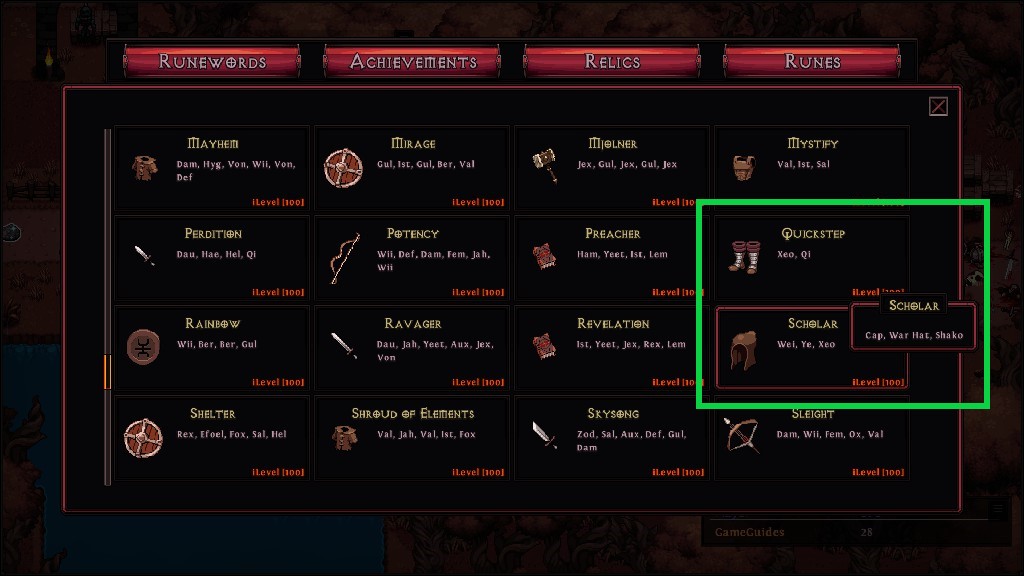
Runewords are powerful items crafted from base Common items slotted with the correct runes.
If you go to the main menu and select journal, you will be presented with the Runewords menu. Here, a massive catalog of Common items can be made significantly stronger.
To create a Runeword in Hero Siege, you must have the correct type of common item you can see in the tooltip for Scholar (Cap, War Hat, Shako) and slot it with the correct runes (Wei, Ye, Xeo).
This means the base Common item you use for Scholar must have 3 rune slots.
On the other hand, Quickstep uses any Common boot with 2 rune slots for Xeo and Qi runes.
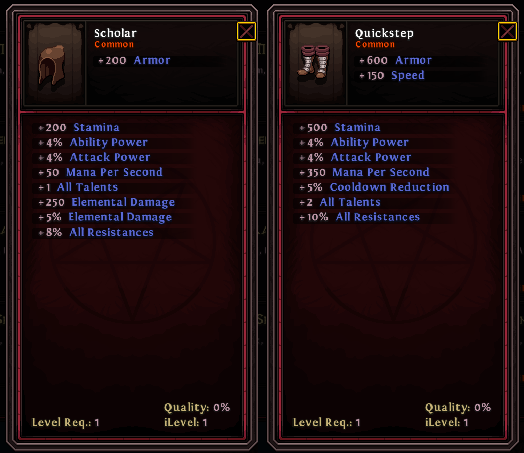
All Runewords require your character to be level 100 to use, with 2 exceptions:
- Scholar
- Quickstep
These can be used from level 1, which is very powerful for a new character, as long as you have the necessary items to craft it.
I have highlighted these in the green square border.
Quests
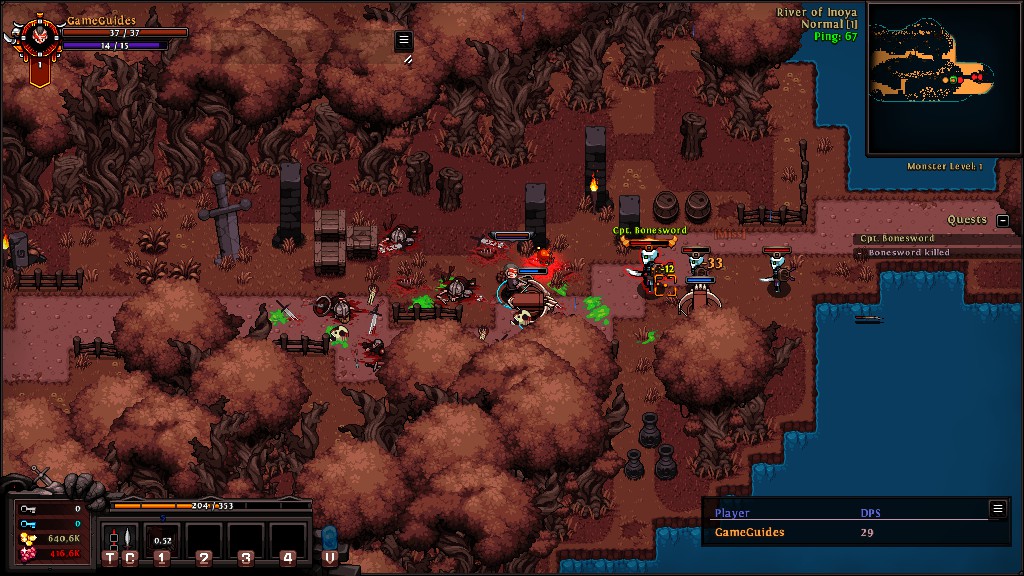
As you progress through the game, you will have optional quests (until you reach the Gates of Valhalla – Act 8).
Quests can tell you to defeat certain bosses, collect items in a zone, release prisoners, destroy portals, and various variations. They are displayed on the far right side of the screen.
Quests help accelerate your leveling process whilst killing monsters quickly, but can ruin your experience gain if you spend too long wandering around the map to complete them without killing monsters.
There are quests in every game zone, but you must complete all the quests in the previous Act (always ending with killing the Act’s boss) before you can unlock quests in the next Act.
Your very first quest is to kill Captain Bonesword before reaching the Town of Inoya.
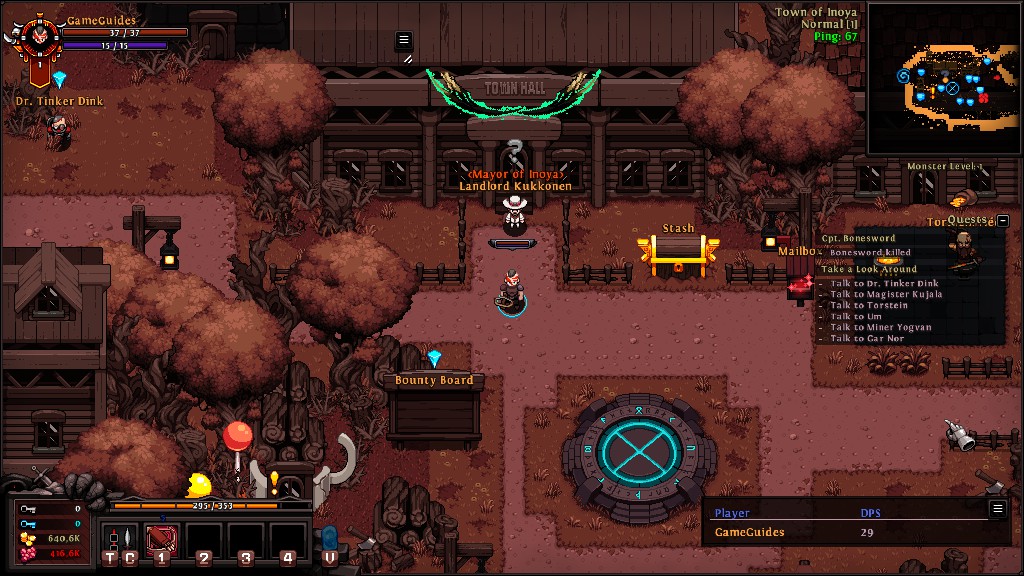
Talk to the Mayor, who will tell you to talk to the rest of the NPCs before you make your way to the first zone.
One of the NPCs you speak to will teach you about mining, which I will disclose in the next section.
Mining
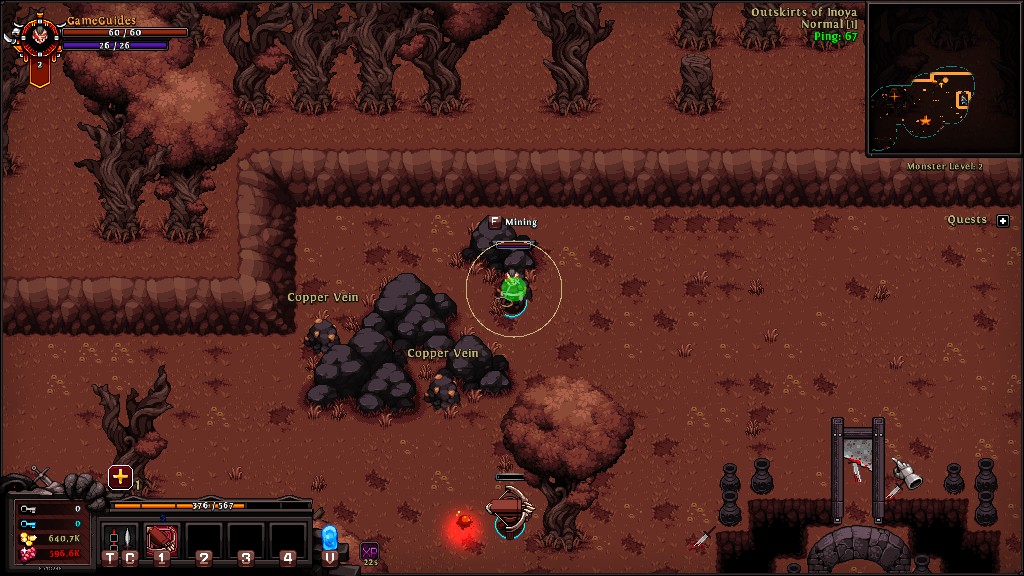
Mining is a skill in Hero Siege that allows you to gather ore.
To successfully collect the ore, you must wait for the outer circle to shrink inside the green circle, then press your action button (F on the keyboard by default).
Most ores are either used to craft items or relics at the blacksmith.
Jade Ore is used for crafting Upgrade tokens, re-roll tokens, ability tokens or satanic dice.
For a more in-depth mining guide, click to view our complete mining guide here.
Jewelcrafting (Act 4)
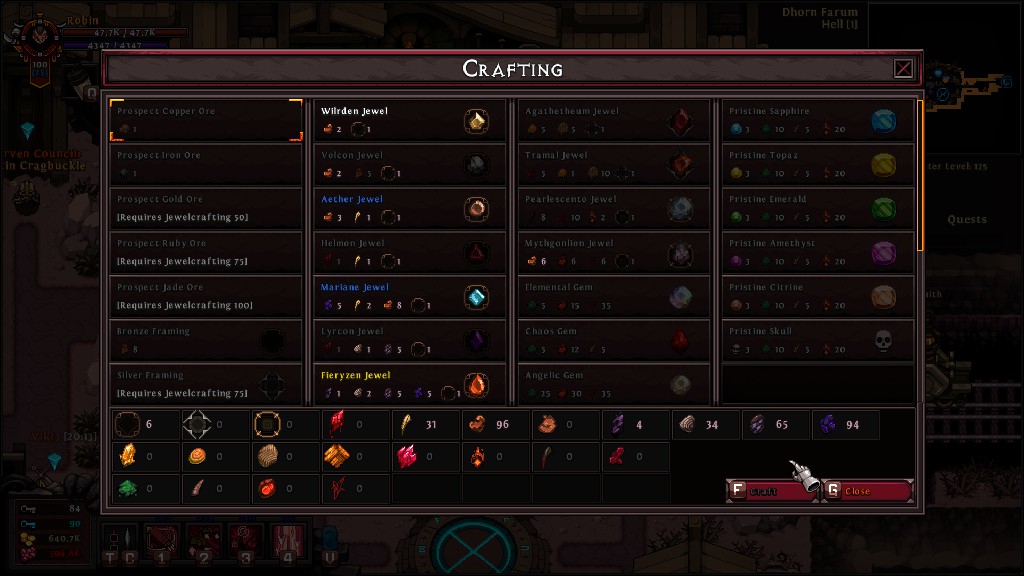
Once you reach Act 4, you will receive a quest from the jewel crafter to prospect ore at his station.
Do not get confused by the quest, you do not need to find a copper ore vein to prospect ore as you would in Old School Runescape,
Jewelcrafting in Hero Siege allows you to socket your items with powerful gems to enhance your hero’s power significantly.
This spreadsheet will show you all the effects of each type of gem.
NOTE – You can only have 1 of each Unique gem equipped on your character.
They give you:
- 800 Elemental Damage
- 5% All Stats
- +2 All Talents
- 10% Attack Speed
You will need a lot of ore to keep your character fully equipped with gems, so it is crucial to keep mining whenever you find ores.
Once you have placed a gem in an item, you cannot retrieve it, so I would only recommend using it on high-quality satanic gear during the end game, where you will not replace that piece of gear for a long time.
Act Zones
You will be placed in the zone’s portal as you enter a zone.
The minimap will display helpful information to keep track of while you play, so you know where points of interest are from outside your field of view.
During your first run-through of the game, the goal is to find the portal to the next zone, eventually leading you to the boss level and then to the next act.
The portal to the next act, or in other cases, the next level of a dungeon, is indicated by the red swirl on the minimap.
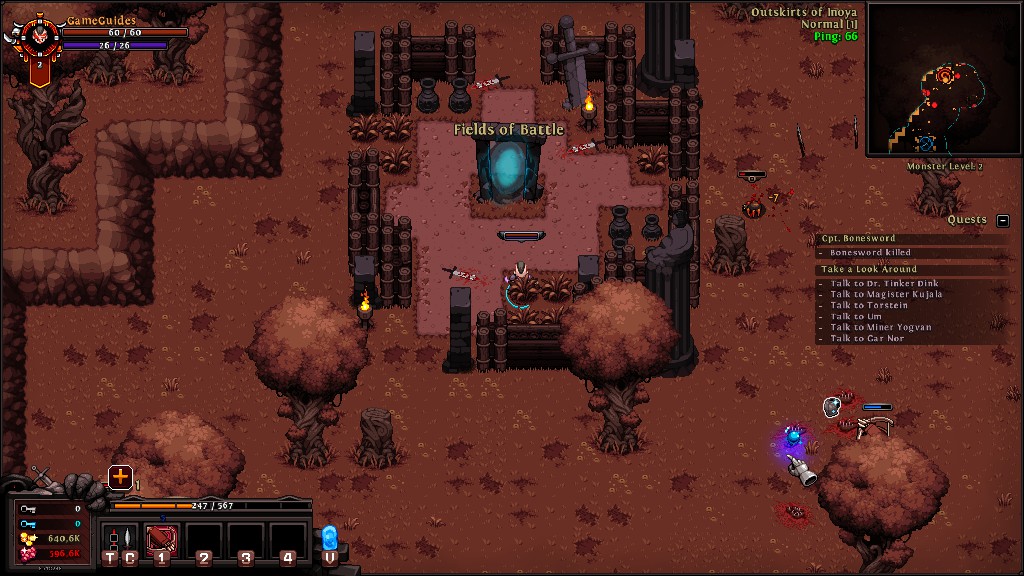
When selecting a zone to play in your current town, you must find and unlock the waypoint in that zone first.
If you are the kind of player who wants to race to the end of the game as quickly as possible, it would be wise to unlock a few of these waypoints across the way, especially before bosses, so that you do not have to travel from the most recently unlocked waypoint.
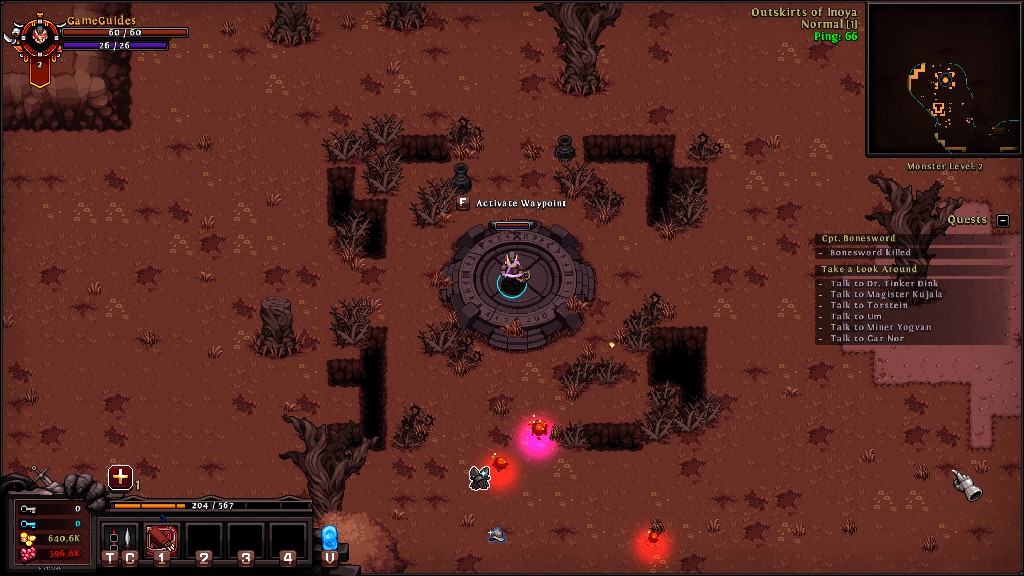
As you progress through zones, the monster level will increase. You can see the monster level anytime, just under the minimap. It is important never to fight enemies 20 levels above or below your current hero level so that you always gain experience from the enemies.
Every zone is randomly generated while keeping to its theme. Most share similar features that you can randomly come across, such as:
- Dungeons
- Unstable Rifts
- Chaos Towers
- Eternal Battlefields
- Small Puzzles for Keys/Relics
Just to name a few.
Many different activities are randomly generated throughout each zone, so I suggest you play the game and enjoy what Hero Sege offers.
Dungeons
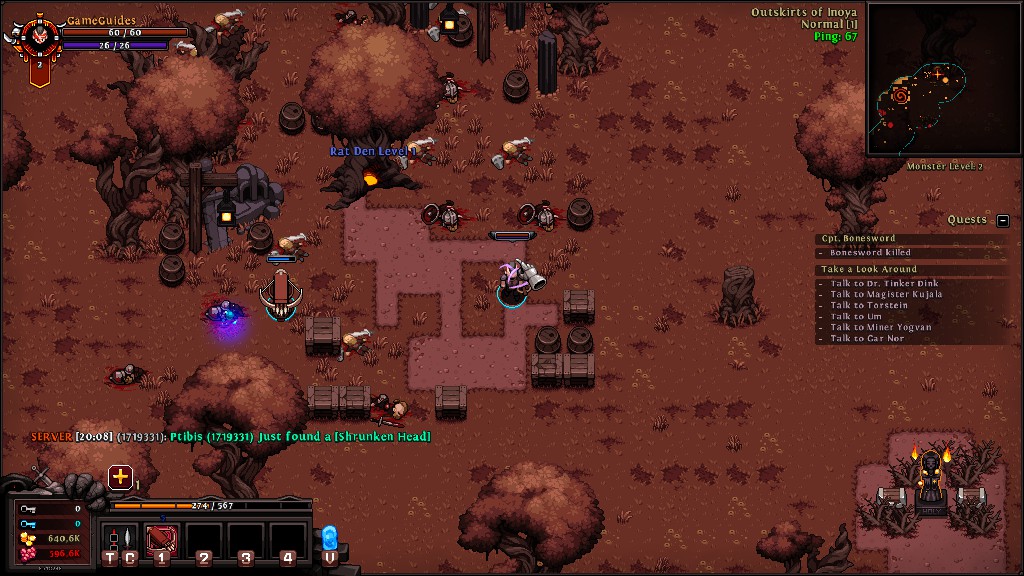
Dungeons usually contain a dense/compact number of enemies to defeat, which can be a great source of experience.
The layout is the same every time you enter each unique dungeon.
You may also find relics or ore deposits in dungeons, so make sure to fully explore them and understand what they contain so you can farm them for the resources you require.
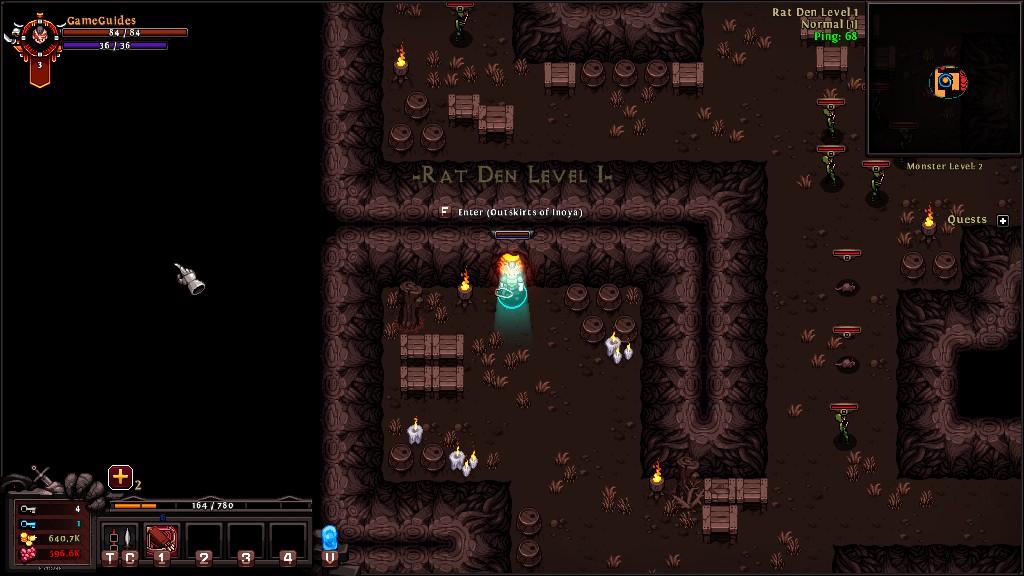
For example, you will always find 2 ore deposits in the Rat Den, therefore, it can be a great way to farm ore.
Each dungeon is specific to an act, so you will only find the Rat Den in Outskirts of Inoya, but it may not appear every time you enter the map as part of the game’s randomly generated mechanic throughout Hero Siege.
Unstable Rifts
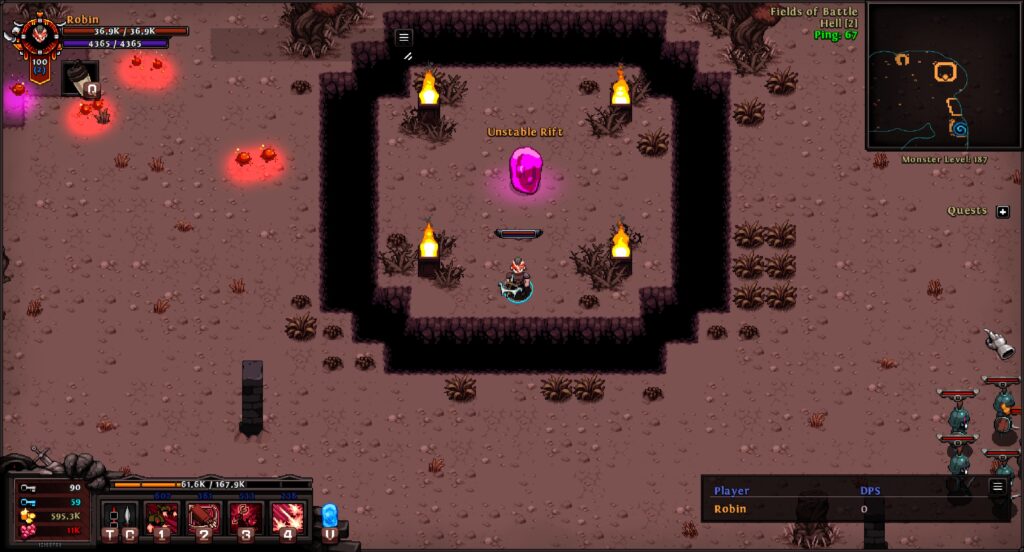
Unstable Rifts can contain an array of locations you are teleported to once you enter them.
A chasm constantly surrounds them, so jump appropriately to enter the rift island or have a flight relic (or be a Demonspawn).
You will most commonly enter the Unstable Rifts Room, which consists of 5 waves of enemies. Here, you will span the room’s center, and enemies will spawn from 4 directions toward the center.
While leveling, this is a fantastic source of experience as you will have to defeat many enemies quickly. Just make sure that you don’t die and try to keep moving constantly!
You can earn up to 3 levels throughout the earlier level by completing one unstable rift room!
For a list of the different combinations of locations you can teleport to, follow this link.
Rare Drops
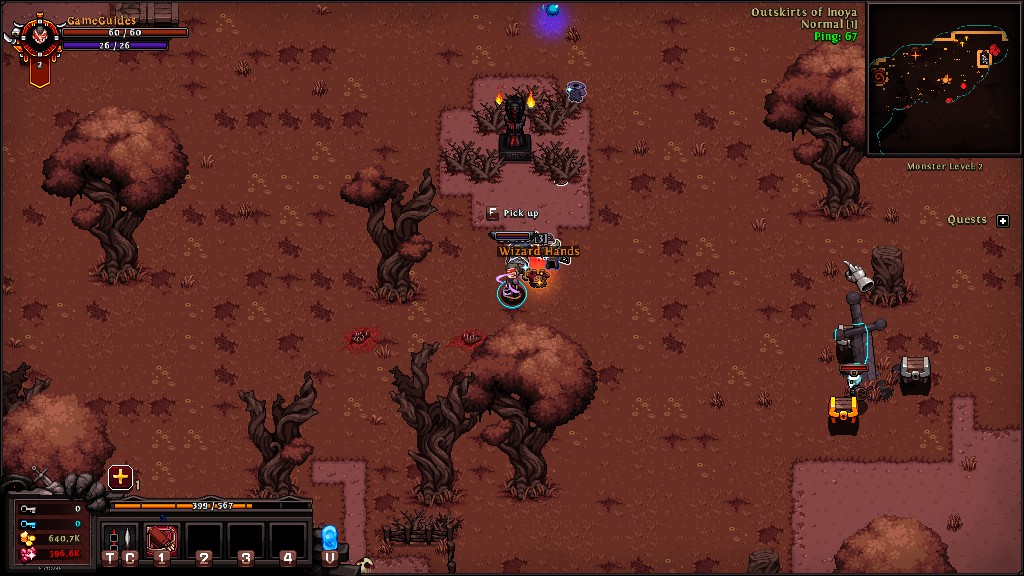
As you defeat enemies, you can drop rare Legendary and Mythic gear. The chance this gear will drop will increase as you unlock nightmare mode with the potential of dropping Satanic gear.
As you will be collecting a lot of loot throughout your journey, you can waste a lot of time looking through the menu and deciding what is best for your current hero’s build.
While you are leveling, my general rule of thumb is if enemies are dying rapidly and you have a decent amount of exp gain on your items already, continue to grind non-stop until your inventory is full, then go back to town, equip, and sell.
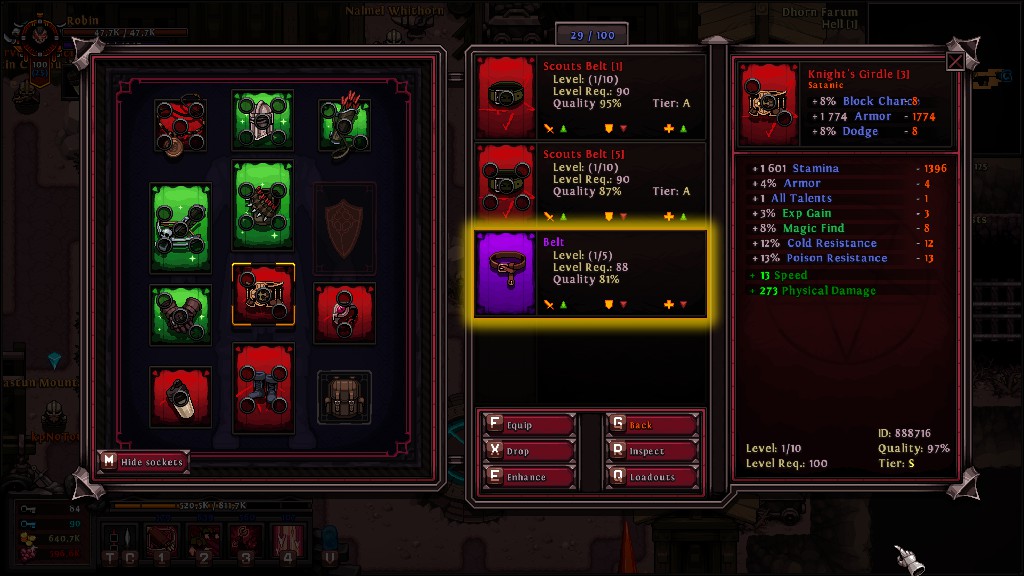
When comparing stats, try not to look at the comparable green and red arrows that dictate the power, health, and defense of an item, as it is not usually accurate to your character’s needs.
Carefully look at which stats you are gaining and losing. In the image above, my hero will gain a bit of physical damage, but I will lose a lot of defenses that help me survive.
Conclusion
This guide outlines everything you need to know to start with Hero Siege.
Congratulations on maxing out your character once you are level 100 and reach the end game!
Read this helpful guide if you’d like to know how to level up in Hero Siege quickly.
Now, this is only the start of the end game. You need to understand how to get better gear to increase your damage and survivability so you can rank on the leaderboards.
As a loot game, luck is required to drop the required gear.
You will now need to learn about:
- Angelic & Biofrost Keys for access to better gear
- Completing Chaos Towers
- Efficient Hell Mode Level 5 farming
- Tier sets
All of which will make your character incredibly powerful!

